LaTeX中图、表目录及缩略表的代码
写在前面
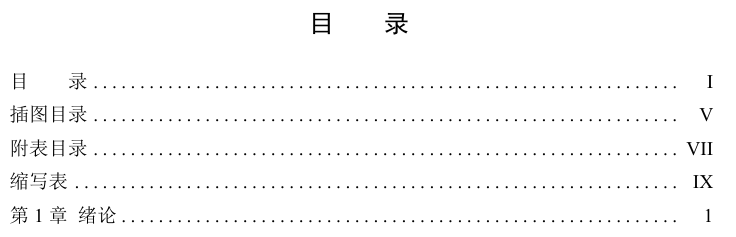
使用LaTeX写作期刊论文,仅仅只需要注意正文、图、表及其相应的数学公式即可。但使用LaTeX进行学位论文的写作时,往往会遇见生成目录的问题。例如,要生成诸如:
目录
第1章 xxx
1.1 xxx
1.1.1 xxx
插图目录
图 1-1 xxx
图 1-2 xxx
图 1-3 xxx
附表目录
表 1-1 xxx
表 1-2 xxx
表 1-3 xxx
原生LaTeX很难解决这个问题,因为它对英文写作适配更加友好。作为中文写作者的我们,势必要做一些修改才能写出满足学位论文要求的LaTeX文件。花了一点时间把图、表目录生成以及缩写表生成问题解决了,把解决后的代码记录在这里,以防忘记。
一、图、表目录
在.cls文件或.tex文件开头,给出如下代码。
\newcommand{\fSong}{\CJKfamily{song}}
\newcommand{\sRealHalfXiaosi}{\fontsize{12.5pt}{13pt}\selectfont}       % 半小四, 约1倍
\newcommand{\sNormalParagraph}{\fontsize{12pt}{20pt}\selectfont}        % 小四,1.67 倍
\newcommand{\nwpuChapterCname}[1]{第 #1 章}            % 目录章节中文标题
\titlecontents{chapter}[0pt]{\fSong\sRealHalfXiaosi\vspace{0.5em}}{
    \contentsmargin{0pt}\fSong\makebox[0pt][l]{\nwpuChapterCname{\thecontentslabel}}\hspace{3.5em}}{
    \contentsmargin{0pt}\fSong}{\titlerule*[.5pc]{.}\contentspage}[\vspace{0em}]

% 定义图目录和表目录的格式
\newcommand{\tableofcontentsNew}{                           %
    \sNormalParagraph                                       % 设置默认字体
    \phantomsection                                         % 用于超链接定位
    \addcontentsline{toc}{chapter}{\contentsname}           % 在总目录中添加目录条目
    \tableofcontents                                        % 调用原始的 \tableofcontents
    \cleardoublepage                                        % 插入双页结束符
}
\newcommand{\listoffiguresNew}{                             %
    \sNormalParagraph                                       % 设置默认字体
    \phantomsection                                         % 用于超链接定位
    \addcontentsline{toc}{chapter}{\listfigurename}         % 在总目录中添加图目录条目
    \begingroup                                             % 开始一个分组来局部改变命令
    \renewcommand{\numberline}[1]{图~##1\hspace*{1em}}      % 修改 \numberline,在编号前加上“图”
    \listoffigures                                          % 调用原始的 \listoffigures
    \endgroup                                               % 结束分组,恢复原来的 \numberline 定义
    \cleardoublepage                                        % 插入双页结束符
}
\newcommand{\listoftablesNew}{                               %
    \sNormalParagraph                                       % 设置默认字体
    \phantomsection                                         % 用于超链接定位
    \addcontentsline{toc}{chapter}{\listtablename}          % 在总目录中添加表目录条目
    \begingroup                                             % 开始一个分组来局部改变命令
    \renewcommand{\numberline}[1]{表~##1\hspace*{1em}}      % 修改 \numberline,在编号前加上“表”
    \listoftables                                           % 调用原始的 \listoftables
    \endgroup                                               % 结束分组,恢复原来的 \numberline 定义
    \cleardoublepage                                        % 插入双页结束符
}
随后,在正文.tex文件中,给出如下代码。
%%================================%%
%%              目录              %%
%%================================%%
\tableofcontentsNew

%%================================%%
%%         图目录与表目录          %%
%%================================%%
% 图目录
\listoffiguresNew

% 表目录
\listoftablesNew
即可得到下图所示目录。
二、缩略表
缩略表一般包括三个部分,缩写表、术语表和符号表。
2.1 缩写表和术语表设置
缩写表和术语表使用下述宏包。
\usepackage[acronym]{glossaries}
\makeglossaries
在\begin{document}前插入如下代码。
% 定义新格式——中文全称 (英文全称, 英文简称)
\newacronymstyle{desc-long-short-v2}
{
\ifglshaslong{\glslabel}{\glsgenacfmt}{\glsgenentryfmt}
}
{
\renewcommand*{\GenericAcronymFields}{description={\the\glslongtok}}
\renewcommand*{\genacrfullformat}[2]{
\protect\firstacronymfont{\glsentrydesc{##1}}##2\space
(\glsentrylong{##1},\space\glsentryshort{##1})
}
\renewcommand*{\Genacrfullformat}[2]{
\protect\firstacronymfont{\Glsentrylong{##1}}##2\space
(\glsentryshort{##1})
}
\renewcommand*{\genplacrfullformat}[2]{
\protect\firstacronymfont{\glsentrydescpl{##1}}##2\space
(\glsentrylongpl{##1},\space\glsentryshortpl{##1})
}
\renewcommand*{\Genplacrfullformat}[2]{
\protect\firstacronymfont{\Glsentrydescpl{##1}}##2\space
(\glsentrylongpl{##1},\space\glsentryshortpl{##1})
}
\renewcommand*{\acronymentry}[1]{\acronymfont{\glsentryshort{##1}}}
\renewcommand*{\acronymsort}[2]{##1}
\renewcommand*{\acronymfont}[1]{##1}
\renewcommand*{\firstacronymfont}[1]{\acronymfont{##1}}
\renewcommand*{\acrpluralsuffix}{\glspluralsuffix}
}
% 导入缩写风格
\setacronymstyle{desc-long-short-v2}
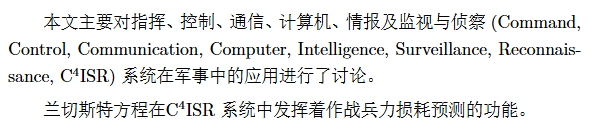
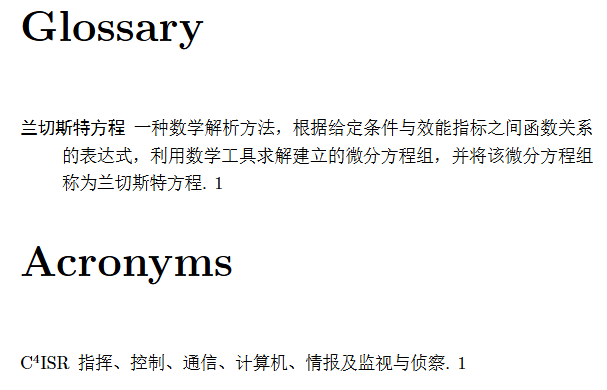
% 定义缩略语
\newacronym[description=指挥、控制、通信、计算机、情报及监视与侦察]{c4isr}{$\rm C^4ISR$}{Command, Control, Communication, Computer, Intelligence, Surveillance, Reconnaissance}
% 定义术语
\newglossaryentry{Lan}{
name = 兰切斯特方程,
description = 一种数学解析方法,根据给定条件与效能指标之间函数关系的表达式,利用数学工具求解建立的微分方程组,并将该微分方程组称为兰切斯特方程
}
上述代码是为了符合中文学位论文中“中文全称 (英文全称, 英文简称)”的规范,单独进行了一番调整后给出的代码。
效果如下所示。
2.2 符号表
符号表使用下述宏包。
\usepackage[intoc,english]{nomencl}
\makenomenclature
在\begin{document}前插入如下代码。
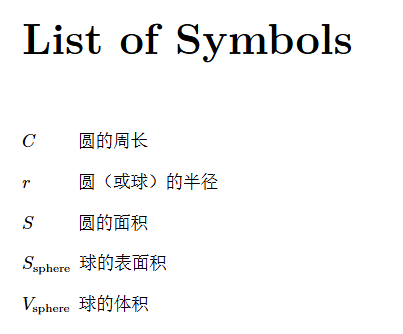
\renewcommand{\nomname}{List of Symbols}

\nomenclature{$r$}{圆(或球)的半径}
\nomenclature{$C$}{圆的周长}
\nomenclature{$S$}{圆的面积}
\nomenclature{$S_{\text{sphere}}$}{球的表面积}
\nomenclature{$V_{\text{sphere}}$}{球的体积}
效果如下所示。
2.3 VsCode编译链设置
根据上面的代码,是没有办法成功编译的,需要在VsCode中设置编译链才可以完成编译。
makeglossaries是编译缩写表和术语表所使用的工具;makenomenclature是编译符号表所使用的工具。
下面给出设置流程:
-
打开VsCode,按下
f1,进入首选项setting.json -
在
latex-workshop.latex.tools中写入如下代码——这一步是为了设置编译工具所需参数
"latex-workshop.latex.tools": [
       {
           "name": "pdflatex",
           "command": "pdflatex",
           "args": [
               "-synctex=1",
               "-interaction=nonstopmode",
               "-file-line-error",
               "%DOCFILE%"
           ]
       },
       {
           "name": "xelatex",
           "command": "xelatex",
           "args": [
               "-synctex=1",
               "-interaction=nonstopmode",
               "-file-line-error",
               "%DOCFILE%"
           ]
       },
       {
           "name": "bibtex",
           "command": "bibtex",
           "args": [
               "%DOCFILE%"
           ]
       },
       // 编译latex中的缩略表
       {
           "name": "makeglossaries",
           "command": "makeglossaries",
           "args": [
               "%DOCFILE%"
           ]
       },
       // 编译latex中的符号表
       {
           "name": "makenomenclature",
           "command": "makeindex",
           "args": [
               "%DOCFILE%.nlo",
               "-s",
               "nomencl.ist",
               "-o",
               "%DOCFILE%.nls"
           ]
       },
   ],
- 在
latex-workshop.latex.recipes中写入如下代码——这一步是为了设置编译链
"latex-workshop.latex.recipes": [
        // 编译latex中的缩略表
        {
            "name": "xe->glo->xe",
            "tools": [
                "xelatex",
                "makeglossaries",
                "xelatex"
            ]
        },
        {
            "name": "pdf->glo->pdf",
            "tools": [
                "pdflatex",
                "makeglossaries",
                "pdflatex"
            ]
        },
        // 编译latex中的符号表
        {
            "name": "xe->nom->xe",
            "tools": [
                "xelatex",
                "makenomenclature",
                "xelatex"
            ]
        },
        {
            "name": "pdf->nom->pdf",
            "tools": [
                "pdflatex",
                "makenomenclature",
                "pdflatex"
            ]
        },
    ],
- 选择对应编译链进行编译。
三、解决思路记录
3.1 图、表目录
- 阅读LaTex手册,查看
tableofcontents、\listoffigures和listoftables每个参数的意义; - 再查看
\renewcommand和\necommand指令如何使用; - 按需修改代码。
3.2 缩略表
- 阅读LaTex手册,查看
glossaries和nomenclature每个参数的意义; - 查看
glossaries.sty中关于\newacronymstyle的定义; - 按需修改
\newacronymstyle,建立新格式desc-long-short-v2,此处参考文献[1]; - 学会
makeglossaries和makenomenclature如何使用,此处参考文献[2,3]; - 在VsCode中设置编译工具和编译链。
3.3 总结
其实用Word会比LaTeX轻松太多,在易用性方面,Word占据很大优势;在排版质感上,还是LaTeX更胜一筹。所以鼓捣了半天LaTeX,就是为了达到Word的效果。
如果不geek的话,把Word熟练掌握,已经足够应对工作学习中99%的情况了。
参考文献
[1] https://www.wangfz.com/archives/65466
[2] https://tex.stackexchange.com/questions/577405/printnomenclature-doesnt-work
[3] https://blog.csdn.net/xovee/article/details/118604572